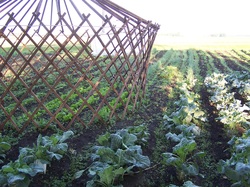
 You know talking about the weather has come to represent the lack of meaningful conversation in our culture, but I find there's a really good reason people talk about the weather a lot. It's the reason I'm going to talk about it right now: It rained. And it rained the perfect amount at the perfect time. It was the difference between figuring out how to water a half acre of bone dry soil, and sitting back and letting the sky do it for me. What a wonderful thing. 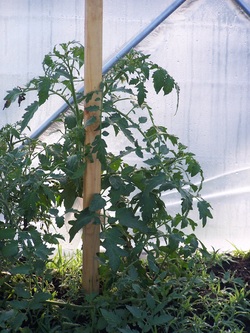 The garden is coming along quite well. I have a method that I use which was inspired by Eliot Coleman. I plant on rows of hilled up soil and grow clover in between. In these pictures when you see black dirt with rows of green, it's probably that I either haven't planted that row or it hasn't germinated yet. The row of green is the clover in between the rows. There are a few reasons for doing this and I'm finding new reasons every season. My attitude is that weeds are going to happen. If I tried to have a completely weed free garden I would go crazy. So the idea is to start your plants with an advantage over the weeds and then spend the summer maintaining that advantage. If you do this you can get the plants to do a lot of the work for you. The biggest way that I give my plants the advantage is by planting my own "weed." This is what the clover is for. Clover is an aggressive plant that will compete well with weeds. It's a legume so it fixes nitrogen and is great for building the soil. By planting my own "weed" I've already eliminated half of the work. So you might be wondering how I keep the clover from competing with the crops. Good question. I use a weed wacker. Sure there are times when I need to get a hoe out or even hand weed, but for the most part I can keep the crops well ahead of the clover just by cutting it on a regular basis. This accomplishes another task which is mulching the plants. The clippings fly off to the side and land at the base of the crop plants keeping in moisture, fertilizing, and acting as a weed barrier all at the same time. 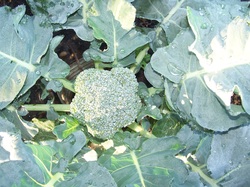 This year we did some experimenting with yurt frames. I built a greenhouse out of a yurt inspired structure called a bjurt, and I'm using an old wooden yurt frame to house my leafy greens. I'd like to grow green beans up the side of the lattice walls and turn it into a green bean house. Our broccoli is forming heads and will be ready to pick next week for sure if not sooner. And our cherry tomatoes have little clusters on them. I'm going to experiment with root pruning this year. You can basically shock a tomato plant into ripening early by pruning the roots. I'll see if we can get some ripe tomatoes by the end of June. That would be a record for me!
1 Comment
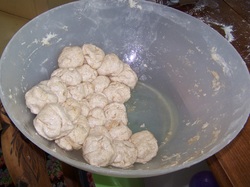 Tortillas are cheap. So why make them? Well there are a few good reasons. For one, homemade tortillas taste WAY better. Partly because they are fresh. Partly because they don't have a lot of preservative. I always hate that weird dry flavor in store bought tortillas. Another reason is that you can make them however you want with whatever you want. We don't usually get extremely creative with this. We usually just add half whole grain flour, but I suppose you could add herbs and spices if you wanted to. It's also a lot of fun for the kids! It is also a lot easier to prepare quick, healthy recipes and eat healthy when you have a stack of freshly made tortillas in the fridge. 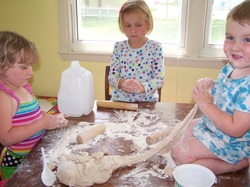 What I really want to talk about though is this concept of holistic living as a way of being cost effective. I find that making tortillas is a great way to illustrate. If I look at what I did this afternoon I can say that I made about 50 tortillas in about 2 1/2 hours. I spent about 5 dollars on the ingredients. I know that I can go to the store and buy 12 tortillas for about 3 dollars. I save about $7.50 on 50 tortillas. So I just spent 2 1/2 hours of fairly hard work saving a measly $7.50. Most people would say that this just isn't cost effective and they would go back to store bought tortillas. But there are a lot of flaws in looking at it this way. It makes a few assumptions. The first assumption is that both tortillas are of equal value. The second assumption is that making tortillas was the ONLY thing I was doing for that 2 1/2 hours. And the third assumption is that I'm clocked in somewhere! 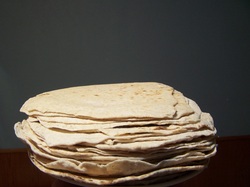 So are store bought tortillas and homemade tortillas equal? No way. I can hardly eat store bought tortillas because I'm used to good ones. But the second question is where we get to the crux of holistic living. Was I doing MORE than making tortillas during that 2 1/2 hours? Well, from the second picture you can see that there was at least one other thing that I was doing. I was giving my kids a learning experience. They helped measure out ingredients. They helped mix. They learned that flour gets really sticky when you add water. They learned that the best way to clean sticky dough off of your hands is to rub dry flour on them. They learned how to turn a little ball of dough into a flat tortilla using a rolling pin. They got to participate in family life. And the list goes on and on. The third assumption is that $7.50 in over two hours is not "worth it." But what would my time have been worth if I wasn't making tortillas? I didn't clock in anywhere. There isn't a minimum wage for my life. Often times the ability to work for nothing is a luxury. And if I want to put a value on my time then the least I can do is claim day care savings. Here in Wells it's about $5 per hour for three kids. That's $12.50 for 2 1/2 hours. Plus $7.50, I'm at $20.00 for 2 1/2 hours. And if I compare to the cost of expensive tortillas I'm sure the number would go up. Also I could compare to the cost of an expensive day care with tortilla making classes. Then the cost would go way up. Pretty soon my time is worth $50.00/ hr. And sometimes I look at it that way. But usually for me the important thing is to asses cost effectiveness through a holistic lens. When you consider all of the benefits of something beyond whats measurable in cost and savings, you start to integrate. Gardening becomes food, exercise, and education. The line between work and play can fade. Saving money and earning money become the exact same thing. And most importantly I find that I start to notice opportunities everywhere. How I can make the best of an item, a situation, or a problem. How I can live holistically. Recipe: Here it is: 6 cups flour 1.5 tsp salt 3 tsp baking powder 3 Tbsp shortening or oil 3.25 cups of water -Mix dry ingredients. Add water and oil. It's better to err on the side of too much water since it's easy to knead in more flour. Knead just enough to mix ingredients well. -In the bowl that was used for mixing the dough add a little bit of oil and spread it around so the surface of the bowl is covered. Make dough into ping pong to golf ball sized balls. Place them in the oiled bowl but roll them around enough to coat them in oil first so they don't stick together when you stack them in the bowl. If there's not enough oil in the bowl to coat all of the balls then just put a little oil in a little bowl and coat the balls that way. Let them sit for about five minutes. -Turn the burner on with a large flat skillet on it. Finding the right amount of heat comes down to trial and error since each stove top is so different, in general about low to medium. -Get out a good rolling pin and dust the counter top with flour. Too much flour will fall off in the pan and accumulate till it starts to burn. Not enough flour will make the dough stick to the counter top and the rolling pin. You'll get a feel for it. Roll out one ball at a time to the thickness of canvas. It should make a tortilla about 6-10" across. -Put it on the hot skillet. Don't put it on unless the skillet is hot or the tortilla will stick. As soon as you put your first tortilla on the skillet start rolling out your next one. The skillet will heat up really fast if you don't keep putting new tortillas on it. Keep an eye on the one in the skillet and flip it when it gets full of bubbles. Flip it with your fingers. Grab the edge quickly and you wont get burned. Trying to use a tool just gets too cumbersome. The second side cooks way faster so by the time you flip it you need to be ready with the next one rolled out. Keep repeating these steps until you have a nice stack of homemade tortillas. -The last step is the most important though. There's a fine line between a tortilla and a cracker. Differences in humidity can make the dough dry or wet. The way to make sure the tortillas always stay floppy even when you mixed the dough too dry is to always keep a plate on top of the stack that is done cooking. Even better is a plate and a towel, but this gets hard to add to the pile. Basically you want the pile to steam itself a little bit. This keeps the moisture in. When you do this, dry tortillas become tough but floppy. There's nothing wrong with a tough tortilla, I kind of like them that way because they are really durable and you can pack them full of good food and they'll roll up without tearing. Our family loves to eat yogurt and the benefits you receive from yogurt are endless. However, the good stuff can be so expensive. Finally, I made some at home!!
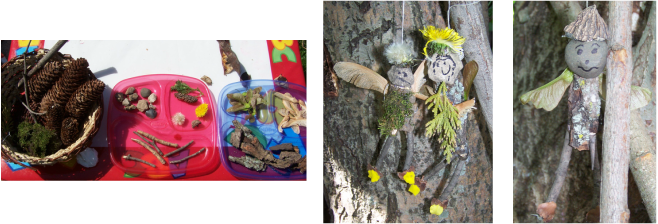
I have always wanted to make homemade yogurt but was always a bit intimidated by the process. I thought you needed some fancy machine to make it. I was very happy when I found out you didn't! It was actually very easy and the kids even helped. Our end results were delicious and now we will be making it on a regular basis. There are tons of yogurt recipes out there. Here is a super simple one. Here is the recipe we used: 1/2 Gallon whole milk (we used Kemps w/out antibiotics) 3.5 TBSP Plain Yogurt (we used Greek style without sugar added) Supplies: Spoon, small bowl, large pot, candy thermometer Steps: Heat all the milk to 180-185 degrees, stirring constantly, cover Remove from stove top and place in a sink full of cold water, bring temperature down to 100 degrees While waiting for milk to cool, measure out your yogurt and put in the small bowl Once milk has cooled, add 1 Cup to the yogurt, mix well Add the yogurt/milk mixture to the rest of the warm milk Mix well, cover Heat oven to 100-150 degrees Turn oven off, put oven light on Put towel over/around pot and place in oven for 8 hours Place yogurt in refrigerator to set. We kept ours in there for ab out 4 hours, the longer the thicker it becomes. And now you have homemade yogurt! We had a great time customizing our own bowls. We used: natural flavorings, sugar, honey, fresh fruit, jams, and topped it off with granola! Everyone loved it!! We also made frozen yogurt pops! YUMMY!  This was sort of an experiment. We wanted to make a greenhouse that was very portable, very reusable, and very durable. We've played around with yurts before in the past and they seem like such a perfect design, but they're so much work. Luckily for us someone already came up with a new design called a bjurt. This guy redesigned the yurt to be completely collapsible like one of those canopies at the Farmers' Market. I thought that would be a perfect greenhouse. It's very wind resistant since it's designed after a yurt. BTW for those of you who don't know what a yurt is, it's a traditional Mongolian dwelling used by the nomads. Genghis Khan used one. It's a beautiful structure. All of the walls fold up. The roof poles come down and you can pack a whole house on a trailer and head across the steppe. It's kind of like an Asian Teepee except quite a bit better. Anyway, they are extremely wind resistant since they don't have any corners. The traditional ones are all round. So the wind just sort of blows over it and actually pushes down a little bit kind of like how a race car is designed. It's the same shape all the way around so it doesn't matter which way the wind is blowing. It vents air really well through a hole in the top. We have ours fitted with a heat sensitive lid which opens and closes automatically depending on the temperature. So we got one and put plastic on it and set it up. Right now we have all of our hot weather crops in there soaking up the sun. When that storm came through a few days ago there was a tornado about 10 miles south of us that touched down. I was pretty concerned about the greenhouse so I went out and checked it just after the storm blew over to make sure it was ok. The picture on top with the sunset is how it looked. Everything was just fine. This would be great for anyone who lives in town but has a big garden outside of town and they want to set up a green house that's pretty low maintenance. I go out every few days to check on it but it keeps a pretty good temperature by itself. And for water I keep a big container full in the middle on a table and just siphon out to drip lines. It would be great to be able to collect rain water for watering. My favorite thing by far about this is how small it becomes when you take it apart. All you have to do is remove the vertical and horizontal wall poles and the whole thing just folds up into a nice tight little bundle. Two of my favorite activities are exploring nature with my kids and crafting with my kids. Today I got enjoy both during our nature craft! This morning we took a walk around the block and picked up pine cones, moss, rocks, sticks, walnuts and anything else that looked interesting. During our walk, the kids learned about pine trees, where moss grows, and had fun competing to find the biggest pine cone. Once we returned home, I sorted out our nature finds to prepare for our craft of Nature Fairies! I got really into it and was really proud of my fairy. As always, my youngest daughter also got really into it and made a really awesome fairy. It took my oldest a bit to get into it, but once she saw how awesome our fairies were, she jumped right in. We then had the idea to hang them in our tree and that is where they now live.
|
Categories
All
Melissa Kruse
Archives
May 2024
|

 RSS Feed