 Birth, babies, breastfeeding! My favorite topics to talk about! That is my favorite part about my visits with my midwife, Nickie. We have a whole hour, usually more, to chat about my baby, birth, and pregnancy.
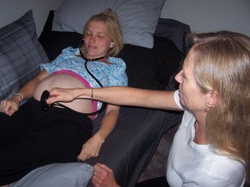
This will be our 3rd home birth. My first daughter age 6, was born naturally in the hospital with a midwife. I had a great experience there, but wanted to be even more in charge of my birth and go through labor in the comfort of my own home. There is nothing better than welcoming a new little life into the world while in my own home. The cuddles, breastfeeding, first kiss from older siblings, all happen there. It is priceless! I think going through labor is the most memorable experience and I wanted to make sure I had a positive and empowering memory of it. We meet with our midwife just as often as you would with an OB. Instead of a hospital setting, it is a family friendly setting in her home office. Starting around the 36th week, she will travel to us for appointments until labor day arrives! She will also travel to our house for the post-partum visits. In the picture above, Nickie found the heart beat of my baby while using a fetoscope and I was able to hear it. My oldest daughter also got to hear it through the fetoscope. Her face just lit up! What else to expect at a visit with a midwife? She measures my belly. This is called Fundal Height. It is a measure of the size of the uterus to assess fetal growth and development. It is measured from the top of the pubic bone to the top of the uterus in centimeters and it should match your baby's gestational age, within one to three centimeters. She also checks the position of the baby and the heart rate. She checks my vital signs, checks a urine sample for the presence of sugar and protein, preforms minor lower back adjustments, we go over any questions or concerns I might have and much more. Another great thing about working with a midwife is after delivery of your baby, your relationship doesn't end. It continues to grow and you can rely on them for advice on your health, baby's health and your older children's health. Childbirth has always been an interest of mine and when my oldest was about 6 months old, I completed a Doula training course. I was planning on finishing the certification process, but my life of being a mother took over. I still have plans on completing the certification process with the end result-- a long term goal of mine, of someday becoming a midwife. Check back for more news on my pregnancy! Only about 5 more weeks to go or 3! You never know!
0 Comments
We had the whole family out picking raspberries on a farm outside of town. It got so dark we couldn't see the berries anymore so we had to leave. On our way back something flew up from the side of the road and it looked like we hit it. So we turned around and drove really slowly with our brights on to see if we could find it. Towards the end of our second pass when we were about to give up we spotted it. It was a nighthawk sitting on the side of the road facing us with it's wings held out. It was alive, but we couldn't tell if it was hurt at all. We all got out of the car to get a closer look. John walked up to it slowly and then picked it up. We all stood around the headlights and looked at it. It was an incredible looking bird. It's not actually a hawk at all. Most people have seen them. They are the birds that fly above the city in the evening with long pointed wings and a white stripe on each wing. They make a nasal sounding "bzzzeeert" when they fly above the houses catching insects in their mouths. And they have the mouths for the job. Seeing the bird up close gave us all a chance to see how huge it's mouth was. It makes sense for a bird that has to use it's mouth for scooping bugs out of the air in mid flight. One of the girls asked if it could fly so John opened up his hand and it just sat there with it's wings open for a few seconds then flopped onto the ground and laid there. We were all thinking that it was seriously injured and wondering what to do with it when all of a sudden it just took off and flew into the night. It was a magical little moment and we all applauded as it flew off.
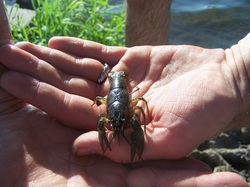 It's fun spending time with kids because it's a good reminder to always be on the lookout for exciting little adventures. We recently went to a little lake to go swimming and there were a lot of rocks around the shore. One of the girls found a crayfish claw, which meant they were living in the water. John's method of catching crayfish is to feel around the bottom edges of the rocks until one gets pinned in between his fingers and the rocks. Then when we have a few of them the girls can build little ponds and streams on the shore for their new little pet to live in. It's a great time to learn about exoskeletons and crustaceans, along with a nice little lesson on how to hold a crayfish without getting pinched!
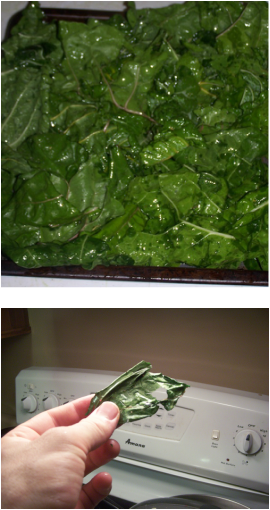 Well we had a ton of swiss chard. We planted it in our backyard and it really took off. There was a period of time when we didn't harvest any so the other day we decided to really cut it back. We ended up with about 4 or 5 pounds of Swiss Chard. That maybe doesn't sound like much, but 5 pounds of leaves is quite a pile. We made a big salad, used some in scrambled eggs, enchiladas and ate some straight, but we still had a whole bunch left over. So we decided to try and make chard chips. We've tried Kale chips before and they were very good. We found someone online that did chard chips so maybe they would be similar. To make a long story short they were good, but making them was much more difficult. Swiss Chard leaves are much thinner than Kale and they also have much more water content. Which means that you have to be extra careful about not letting them overlap at all. When they overlap the water gets trapped in the leaves underneath and they steam instead of dry out. Then you just end up with a tray of steamed Swiss Chard. It's not a terrible situation, but 5 pounds of steamed Swiss Chard is pretty hard to eat with any expediency. I suppose you could freeze it though. Luckily I made that mistake on only my first tray. Needless to say I had my fill of steamed Swiss Chard that night. I was able to pull off some good chips from the outer half of the tray. They were good, the kids liked them and we ate almost everything. But I think if I were to do it again I'd leave the chips to the Kale and just freeze Swiss Chard after steaming it. Another thing to try is Swiss Chard rolls. I'll let my plants grow back and try that next time.
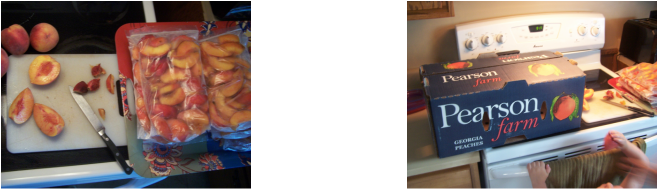 Action shot of someone stealing a peach. (look closely at the picture on the right) Action shot of someone stealing a peach. (look closely at the picture on the right) There's a big semi truck full of delicious tree ripened Georgia peaches that rolls around southern Minnesota selling peaches for cheap. Who could pass that up? You have to buy at least 25 pounds though. They make stops at a whole bunch of towns around here and stay for only a few hours. If you don't know about it then you're out of luck, and we were lucky to find out. Here's a fun little story about John getting some peaches:
It was an unusually hot day for us at about 101 and very humid. On top of that our air conditioning in our car had just gone out and we had to drive about 40 miles round trip to get the peaches. The girls were sure they wanted to come so I took them for a test drive around town in the heat just so they would know what it was going to be like. After they decided that they were tough enough we got a couple ice packs, bottled water, some freeze pops and hit the road. As luck would have it the peach truck was parked in the parking lot of an auto parts dealer. I had enough freon left in a couple of cans to refill the a/c but there was a leak. The guy at the auto parts store said I probably needed to replace the O rings. That was about 5 bucks. Since I had my tools there I decided to tackle the job in the parking lot on the shaded side of the building. It's not every day that things go this smoothly, but I'm happy to say that after about 20 minutes of tinkering and peach eating we were back on the road with a/c and 24 pounds of peaches. When we got home we cut most of them up and froze them. We'll decide what to do with them later. And yes, they were amazing! 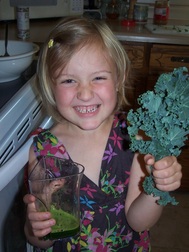 Clare with Kale Clare with Kale My hubby got me a juicer for my birthday, which is in January, and I am excited to finally start juicing the veggies from our garden! I wanted to find out the best leafy greens to juice (other than spinach) so the kiddos and I picked all the leafy greens we had and started juicing each one. Whatever we juiced, yummy or icky, we all took our turn tasting it. We started with Kale. We love to eat Kale steamed or sauteed and I thought it would be delicious juiced. WRONG! Pretty bitter and strong. It would be better with an apple or some carrots added to the blend, but we were only focusing on the leafy greens. One cup of kale contains 36 calories, 5 grams of fiber, and 15% of the daily requirement of calcium and vitamin B6, 40% of magnesium, 180% of vitamin A, 200% of vitamin C, and 1,020% of vitamin K. It is also a good source of minerals copper, potassium, iron, manganese, and phosphorus. 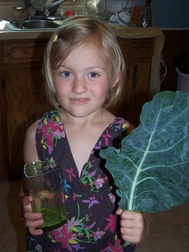 Clare with Collard Greens Clare with Collard Greens Next, we juiced collards. We have a garden full of collards, but we don't cook with it that much. The juice was pretty strong and bitter. A little bit better flavor than Kale. Contains: folates, vitamin C, vitamin-A, vitamin-K, vital B-complex groups of minerals such as niacin vitamin B-3, vitamin B-5, vitamin B-6 and riboflavin. The leaves and stems are good in minerals like iron, calcium, copper, manganese, selenium and zinc 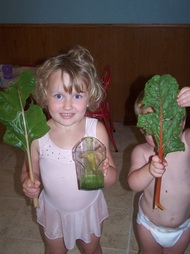 Rebecca and Miles with Rainbow Chard Rebecca and Miles with Rainbow Chard Then we juiced our Rainbow Swiss Chard. This is such a beautiful plant. The kids and I decided that this was the best leafy green to juice. It had the most juice and the flavor wasn't so strong and bitter.
Contains: vitamin C, vitamin K, vitamin A, rich in B-complex group of vitamins such as folates, niacin, vitamin B-6, thiamin. A rich source of minerals like copper, calcium, sodium, potassium, iron, manganese and phosphorus. Next time we will come up with different blends! We love to eat Basil Pesto! It is really easy to make and really healthy. Basil contains these important vitamins and minerals: beta carotene, vitamin A, vitamin K, potassium, manganese, copper, iron, and magnesium. We usually keep our recipe pretty simple. Here it is: Ingredients
Directions: Combine basil, garlic, Parmesan cheese, olive oil, and nuts in the bowl of a food processor or blender. Blend to a smooth paste. Mix your pesto with noodles for a light and delicious meal! Serves 4 If you have spinach or any other leafy vegetable, you can also add them to the food processor. When Stinging Nettles are in season, we like to add those. This will increase the nutrients and it is a good way to use up those greens! 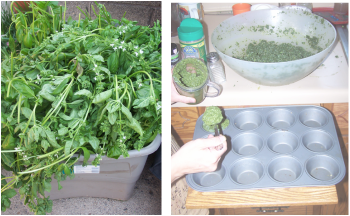 Freezing Pesto
We know a family in the Wells area who grows A LOT of Basil using the Hydroponics method. They recently cut everything down and were generous enough to give us a huge tub (see picture) of the Basil they did not want. What did we do with all that Basil? We turned it all into pesto and froze it! This is so easy to do and it will last through the Winter months. *Make a huge batch of pesto (using the recipe above) and scoop into muffin tins or ice trays covered with parchment paper. Once frozen, pop them out and store them in a ziplock bag in the freezer. When ready to eat, put on top of hot cooked pasta, put cover on the pot and let thaw. Mix, add more cheese and pine nuts and EAT!! John and I are running a small CSA (Community Supported Agriculture) in the Wells area. We have a garden that is about 1 acre and use only organic gardening methods. To help our customers know what to do with their large baskets of produce, we will be adding healthy, quick and easy recipes to our blog every week. This week is: Green Onions, Kale and eggs. My favorite way to eat Kale is to saute it with onions and add to soups, pasta or eggs. To make this meal: Saute Kale, Green onions, add to scrambled eggs, season with pepper and salt . Super easy, very healthy and YUMMY!!  Pic #1: Miles eating an onion. Do you know any other 2 year olds who eat raw onions?!?! Pic #2: Onions and Kale Pic #3: Finished! Yummy! 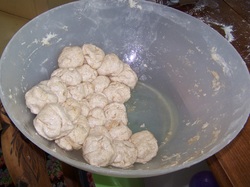 Tortillas are cheap. So why make them? Well there are a few good reasons. For one, homemade tortillas taste WAY better. Partly because they are fresh. Partly because they don't have a lot of preservative. I always hate that weird dry flavor in store bought tortillas. Another reason is that you can make them however you want with whatever you want. We don't usually get extremely creative with this. We usually just add half whole grain flour, but I suppose you could add herbs and spices if you wanted to. It's also a lot of fun for the kids! It is also a lot easier to prepare quick, healthy recipes and eat healthy when you have a stack of freshly made tortillas in the fridge. 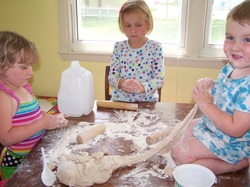 What I really want to talk about though is this concept of holistic living as a way of being cost effective. I find that making tortillas is a great way to illustrate. If I look at what I did this afternoon I can say that I made about 50 tortillas in about 2 1/2 hours. I spent about 5 dollars on the ingredients. I know that I can go to the store and buy 12 tortillas for about 3 dollars. I save about $7.50 on 50 tortillas. So I just spent 2 1/2 hours of fairly hard work saving a measly $7.50. Most people would say that this just isn't cost effective and they would go back to store bought tortillas. But there are a lot of flaws in looking at it this way. It makes a few assumptions. The first assumption is that both tortillas are of equal value. The second assumption is that making tortillas was the ONLY thing I was doing for that 2 1/2 hours. And the third assumption is that I'm clocked in somewhere! 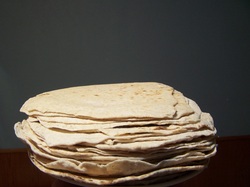 So are store bought tortillas and homemade tortillas equal? No way. I can hardly eat store bought tortillas because I'm used to good ones. But the second question is where we get to the crux of holistic living. Was I doing MORE than making tortillas during that 2 1/2 hours? Well, from the second picture you can see that there was at least one other thing that I was doing. I was giving my kids a learning experience. They helped measure out ingredients. They helped mix. They learned that flour gets really sticky when you add water. They learned that the best way to clean sticky dough off of your hands is to rub dry flour on them. They learned how to turn a little ball of dough into a flat tortilla using a rolling pin. They got to participate in family life. And the list goes on and on.
The third assumption is that $7.50 in over two hours is not "worth it." But what would my time have been worth if I wasn't making tortillas? I didn't clock in anywhere. There isn't a minimum wage for my life. Often times the ability to work for nothing is a luxury. And if I want to put a value on my time then the least I can do is claim day care savings. Here in Wells it's about $5 per hour for three kids. That's $12.50 for 2 1/2 hours. Plus $7.50, I'm at $20.00 for 2 1/2 hours. And if I compare to the cost of expensive tortillas I'm sure the number would go up. Also I could compare to the cost of an expensive day care with tortilla making classes. Then the cost would go way up. Pretty soon my time is worth $50.00/ hr. And sometimes I look at it that way. But usually for me the important thing is to asses cost effectiveness through a holistic lens. When you consider all of the benefits of something beyond whats measurable in cost and savings, you start to integrate. Gardening becomes food, exercise, and education. The line between work and play can fade. Saving money and earning money become the exact same thing. And most importantly I find that I start to notice opportunities everywhere. How I can make the best of an item, a situation, or a problem. How I can live holistically. Recipe: Here it is: 6 cups flour 1.5 tsp salt 3 tsp baking powder 3 Tbsp shortening or oil 3.25 cups of water -Mix dry ingredients. Add water and oil. It's better to err on the side of too much water since it's easy to knead in more flour. Knead just enough to mix ingredients well. -In the bowl that was used for mixing the dough add a little bit of oil and spread it around so the surface of the bowl is covered. Make dough into ping pong to golf ball sized balls. Place them in the oiled bowl but roll them around enough to coat them in oil first so they don't stick together when you stack them in the bowl. If there's not enough oil in the bowl to coat all of the balls then just put a little oil in a little bowl and coat the balls that way. Let them sit for about five minutes. -Turn the burner on with a large flat skillet on it. Finding the right amount of heat comes down to trial and error since each stove top is so different, in general about low to medium. -Get out a good rolling pin and dust the counter top with flour. Too much flour will fall off in the pan and accumulate till it starts to burn. Not enough flour will make the dough stick to the counter top and the rolling pin. You'll get a feel for it. Roll out one ball at a time to the thickness of canvas. It should make a tortilla about 6-10" across. -Put it on the hot skillet. Don't put it on unless the skillet is hot or the tortilla will stick. As soon as you put your first tortilla on the skillet start rolling out your next one. The skillet will heat up really fast if you don't keep putting new tortillas on it. Keep an eye on the one in the skillet and flip it when it gets full of bubbles. Flip it with your fingers. Grab the edge quickly and you wont get burned. Trying to use a tool just gets too cumbersome. The second side cooks way faster so by the time you flip it you need to be ready with the next one rolled out. Keep repeating these steps until you have a nice stack of homemade tortillas. -The last step is the most important though. There's a fine line between a tortilla and a cracker. Differences in humidity can make the dough dry or wet. The way to make sure the tortillas always stay floppy even when you mixed the dough too dry is to always keep a plate on top of the stack that is done cooking. Even better is a plate and a towel, but this gets hard to add to the pile. Basically you want the pile to steam itself a little bit. This keeps the moisture in. When you do this, dry tortillas become tough but floppy. There's nothing wrong with a tough tortilla, I kind of like them that way because they are really durable and you can pack them full of good food and they'll roll up without tearing. Our family loves to eat yogurt and the benefits you receive from yogurt are endless. However, the good stuff can be so expensive. Finally, I made some at home!! I have always wanted to make homemade yogurt but was always a bit intimidated by the process. I thought you needed some fancy machine to make it. I was very happy when I found out you didn't! It was actually very easy and the kids even helped. Our end results were delicious and now we will be making it on a regular basis. There are tons of yogurt recipes out there. Here is a super simple one. Here is the recipe we used: 1/2 Gallon whole milk (we used Kemps w/out antibiotics) 3.5 TBSP Plain Yogurt (we used Greek style without sugar added) Supplies: Spoon, small bowl, large pot, candy thermometer Steps: Heat all the milk to 180-185 degrees, stirring constantly, cover Remove from stove top and place in a sink full of cold water, bring temperature down to 100 degrees While waiting for milk to cool, measure out your yogurt and put in the small bowl Once milk has cooled, add 1 Cup to the yogurt, mix well Add the yogurt/milk mixture to the rest of the warm milk Mix well, cover Heat oven to 100-150 degrees Turn oven off, put oven light on Put towel over/around pot and place in oven for 8 hours Place yogurt in refrigerator to set. We kept ours in there for ab out 4 hours, the longer the thicker it becomes. And now you have homemade yogurt! We had a great time customizing our own bowls. We used: natural flavorings, sugar, honey, fresh fruit, jams, and topped it off with granola! Everyone loved it!! We also made frozen yogurt pops! YUMMY! 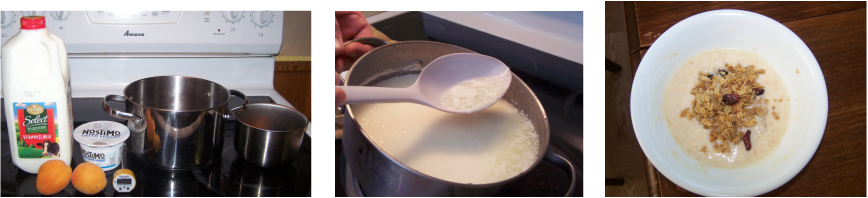 |
Categories
All
Melissa Kruse
|
 RSS Feed